Register Domain SA offers fast, reliable Node.js hosting in South Africa. This step-by-step guide shows you exactly how to deploy and run your first Node.js application - even if you’ve never hosted Node.js before.
Quick Summary:
-
Create the Node.js application in cPanel
-
Upload your project files (including
package.json) -
Run NPM Install (before starting your app)
-
Start (or Restart) the app
What you need before you start
- Access to your hosting account’s cPanel
- A Node.js project with a valid
package.json - Your app’s startup file (commonly
app.js,index.js, orserver.js)
Step 1: Log in to cPanel and open the Node.js tool
- Log in to your cPanel.
- Scroll to the Software section.
- Click Setup Node.js App.
Tip: If you don’t see “Setup Node.js App”, please make sure that you signed up at Node.js Hosting South Africa
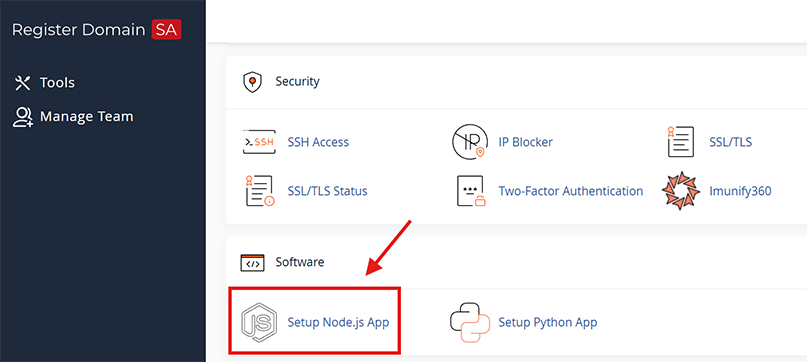 Screenshot: In cPanel, go to Software → Setup Node.js App.
Step 2: Create your Node.js application
- Click Create Application.
- Choose the correct settings (explained below).
- Click Create.
Recommended settings (most common)
- Node.js Version: Select the version your app requires (for example 22 or 24)
- Application Mode: Production
- Application Root: Example:
nodeapp - Application URL: Choose your domain/subdomain (example:
https://example.co.za) - Startup File: Example:
app.js/index.js/server.js
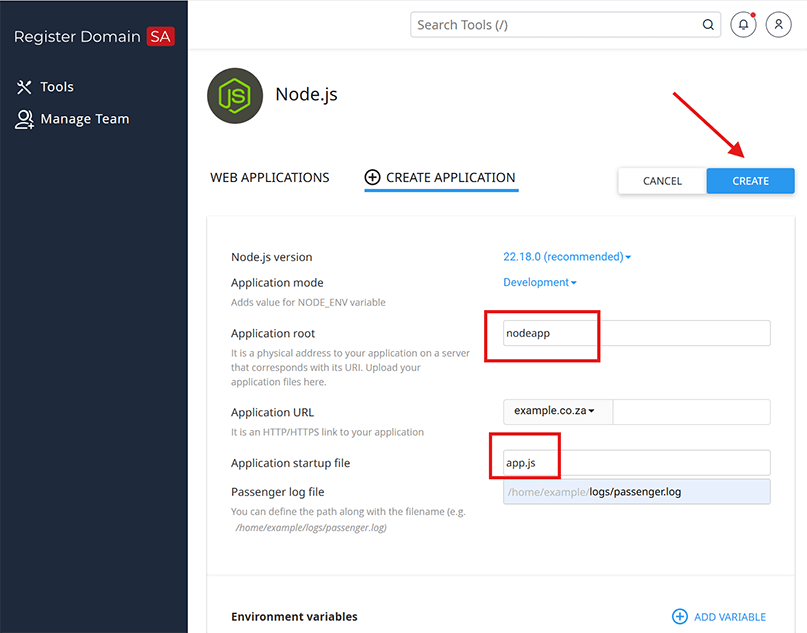 Screenshot: Configure the Node.js version, root folder, URL, and startup file.
Step 3: Upload your Node.js app files to the Application Root
After creating the app, upload your project files into the folder you selected as Application Root (example: /home/username/nodeapp).
Option A: Upload with File Manager (recommended)
- Open File Manager in cPanel.
- Navigate to your app folder (example:
nodeapp). - Upload your project files, including:
package.json- Your Node.js source files (e.g.
app.js/index.js) - Any folders needed (e.g.
routes,public,views)
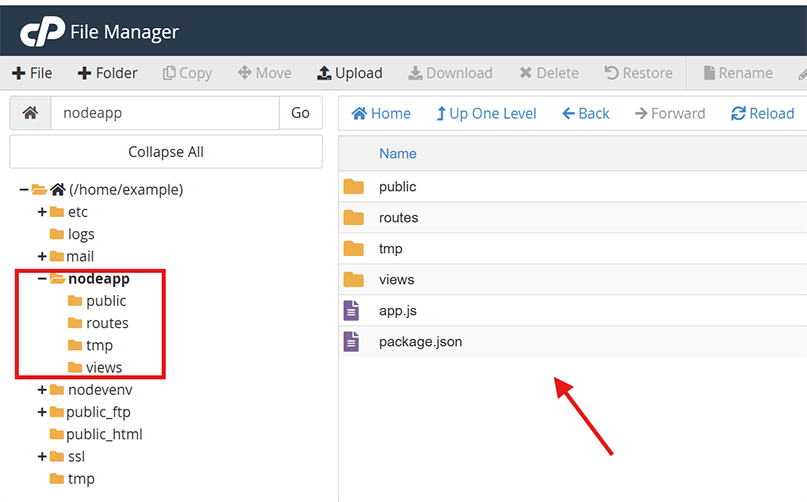 Screenshot: Upload your Node.js files into the Application Root folder using File Manager.
Step 4: Install dependencies (Run NPM Install)
- Go back to Setup Node.js App.
- Find your application in the list.
- Click Run NPM Install to install dependencies from
package.json.
Note: You do not need SSH access. The install process runs inside your application environment.
Step 5: Start the Node.js application
- In Setup Node.js App, click Start App.
- Open your domain/subdomain in a browser to confirm the site loads.
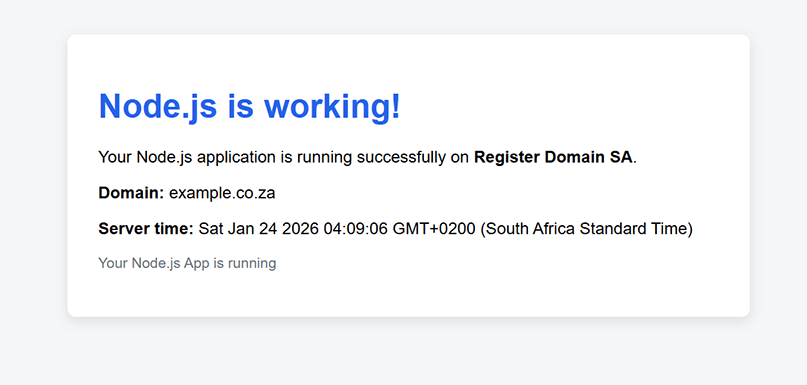 Screenshot: Use Start / Restart to apply changes and bring your app online.
Updating your app (files or code changes)
- Upload your updated files to the same Application Root folder.
- Click Restart App.
- If you changed dependencies, run NPM Install again.
Important: Make sure your app listens on the correct port
The environment assigns a port automatically. Your app should listen on process.env.PORT.
const express = require("express");
const app = express();

const PORT = process.env.PORT || 3000;

app.get("/", (req, res) => res.send("Node.js is running on Register Domain SA!"));

app.listen(PORT, () => console.log(`Listening on ${PORT}`));
Troubleshooting (common Node.js cPanel issues)
1) My app won’t start
- Confirm the Startup File name matches your main file exactly (case-sensitive).
- Make sure
package.jsonexists in the Application Root folder. - Run NPM Install again.
- Check the application logs inside Setup Node.js App.
2) I get a 503 / Application Error
- Click Restart App.
- Review the logs in Setup Node.js App for errors.
- Ensure your code uses
process.env.PORT(see above). - Confirm the domain/subdomain selected in Application URL is correct.
3) My changes aren’t showing
- Restart the app after uploading changes.
- Clear your browser cache or test in a private/incognito window.